While older homes may not have the proper wiring for up-to-date technology, that shouldn’t prevent you from bringing your communication and safety up to speed. Modern wireless intercoms are also more intelligent and less grubby, and can be installed easily. No running of cables which makes them ideal in heritage properties, weatherboard homes, and older brick builds. If other future upgrades like a wireless alarm system Melbourne are on the agenda, well installing a wireless intercom is an excellent first step.
So, Why a Wireless Intercom for an Old House?
It does not depend on some existing house wiring. They work with existing technologies like Wi-Fi, Bluetooth, or use long-range radio signals. Which translates to being able to install them without knocking down walls, drilling deep, or disturbing delicate features.
Here are some other reasons home owners like this setup:
- Fast installation
- No structural changes
- Portable and easy to expand
- Great in which to live in multi-storey homes or extensions
These systems work effectively with more extensive smart security choices, such as a wireless alarm system in Melbourne, taking home safety up a notch with less hassle.
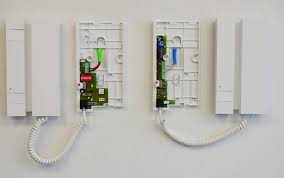
Step #1 − Select the Proper Intercom System
Not all devices are equal. First, do a feature comparison, figure out what suits your property layout with the model.
Look for:
- Clear audio and stable connection
- Long-range coverage for larger homes
- Battery backup
- Weather-resistant outdoor stations
- Mobile app support
If you are planning upgrades sooner or later, choose a system where you could go for easy wireless alarm system installation.
Step 2: Plan Your Setup
Venturing through your home − and establishing, both, where the indoor station will be positioned and the outdoor station − is simple enough. Consider your needs for convenience, visibility, and signal strength.
Tips for better planning:
- Don’t go for the overly thick or fortified walls
- Keep devices within recommended distance
- Mounting points at eye level for clear visibility
Having a clear picture of your layout prevents you from having to move devices around later.
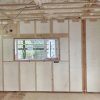
Step 3: Prepare the Areas for Mounting
Wireless intercoms just require simple mounting hardware. Wash the surfaces and let them dry. Almost all of the units come with brackets or adhesive pads. Screws generally provide a more stable attachment for older brick or textured surfaces.
It requires no special instruments, and it takes just minutes to complete.
Step 4: Install Outdoor Station
Outdoor station − visitors main point of contact makes sure it is:
- Mounted near the main entrance
- Sheltered from direct rain
- Well visible and easily accessible
Power it up with batteries or plug if necessary, once mounted on your system.
Step5: Install the Indoor Units
Install indoor displays or audio units for maximum use. More typical places are hallways, kitchen areas, and living spaces. They are battery operated which allows you to position them anywhere you desire until you find that sweet spot.
Stage 6: Link the System and Run Some Tests
If your intercom supports remote access, then download the app. Activate pairing mode on all devices as per the manufacturer’s guidelines. Sound quality, volume and bass response
Should you want to add motion detectors and/or a full-blown alarm package to your setup, this no-fuss process will come naturally to you − particularly when you lean towards full on wireless alarm system installation.
Final Thoughts
It is not going to be complicated, installing a wireless intercom in an old house. Eliminating the effort of wiring, hardware is barely needed at all, pairing is effortless, and the operation is fast and clean. These systems provide you with modern conveniences without altering the original charm of your home. From an upgrade in communication, or a guiding point for a larger security institution like a wireless alarm system Melbourne, everything is practically seamless, not forgetting safe and sound, and stress free with the wireless tech.